Tuesday, March 4, 2014

Woodworking Class blog


Hi Folks.
I made this blog so I can post information relevant to our class. If you forget to read it, it wont do us much good, so check it frequently.
Ive been in communication with Tim Holton of Holton Studio Frame Makers, about his aniline dyes. He gets them from Woodworkers Supply. I just ordered some for myself, to test them out. Here are Tim Holtons colour samples.
Above, is the Woodworkers Supply colour chart of water-based aniline dyes.
Also notice that Tim Holton shows profile views of his various mouldings, with measurements, so you can use these to help you design future profiles of your own.
Read More..

Monday, March 3, 2014

Custom spice cabinet

I just finished this custom cabinet for holding and displaying spice jars. This is salvaged elm from the Sydney area. At one time this wood was headed for the splitter and the stove. The back is pine. I was really pleased to be asked to make this piece as a gift for a local artist.
Read More..

Gaboon Ebony

Gaboon Ebony
Since we are all going to be buying our own wood at some point for at least one of our projects I thought it might be useful to some people in the class to do some research on exotic woods that they might be interested in. The picture above is a turning stick of gaboon ebony. This particular piece of wood is pre-cut so that it may be turned on a lathe. You can buy pieces like this in all types of wood. I found a website that has information on a very wide variety of different wood, most of which I have never heard of (http://www.hobbithouseinc.com/personal/woodpics/#letterA). I chose gaboon ebony because I have some experience working with it. This is the blackest wood in existence, it is so dark that you can hardly see the grain. It is actually just the inside of the ebony tree.
It comes from Africa and can be very expensive. I bought a small amount last semester at Southern Lumber for $70 per board foot, which was on sale at the time. Since it is so expensive it is mainly used in small amounts for details such as piano keys or knife handles. It is very dense and can be fragile if dropped on a hard floor. Its extremely hard to work with because of the density, but if you are persistent you will definitely be happy with the outcome. When gaboon ebony is finished just by sanding it is extremely smooth to the touch and very beautiful. It has a natural shine and can be finished to a higher polish than most wood. If you absolutely have to have a finish on it www.woodturnersresource.com recommends using a sanding sealer before applying any oil or lacquer.
When you are working with ebony it is important to not be exposed to the dust for long periods of time. A dust mask is recommended when handling this wood because it can be toxic. I would not advise you to make an entire table of ebony, but if you want to add some small black details this wood can be that extra elegance you need.

Read More..

Sunday, March 2, 2014

Fall Mantel Ledge Ideas

Hey there!  Its only the beginning of the week and Im exhausted already and wishing for Friday.  Can you believe we are nearing the beginning of October?  I cant!  It will be Christmas before you know it. 

I finished up our fall mantel/ledge this past weekend.  I think I changed it about a 100 times until I was satisfied with it.  I tried to use things I already had around the house cause I dont like spending extra dough on seasonal things.  First thing I did was top it with a wide plank of barn wood to warm up the ledge and give it a little more depth so I would have more room.  Heres a look.....
Remember those vintage music magazines from 1936 and 37?  Well, I didnt use them in the guest bathroom.  I decided to use them here but I didnt want to commit to actually sticking them to the wall, so I picked up 3 foam boards from the Dollar Tree and glued interesting ads from the magazines to each one, then nailed the boards to the wall.  The trays are also from the Dollar Tree, but I spray painted them oil rubbed bronze cause its what I had.
The pumpkins were decor I had left over from last year, except the small white ones, which are real.  The old wood frame is one of the finds from our picking trip.  I love the the music ad centered in the frame.  I thought it tied in very nicely with the New York subway art also hanging in the room.
The books are vintage finds, the candles from the Dollar Tree.  I wrapped them in jute twine for a little texture.   These arent going to be lit, so its all good, no worries about all the paper and fire. :)
These iron pots were also found on our picking trip.  My kids love candy corn and caramel so I filled em up so they could grab a treat when they walk by.
Thats it!  What do you think?
Happy Fall!  Have a great day!  Linking up with TLC!  Come join the fun and get some great ideas for fall!
The Lettered Cottage
Read More..

Dining Room Table

One of the things Ive loved so much about blogging this past year is how much Im learning about home design, building my own furniture, and various wood treatments.  And I look forward to learning so much more.  Now that I work with wood for a living, Ive also learned so much about different ways to age new wood, though, Im certainly no expert.

Several years ago when I decided to build a new dining room table with the table legs that my dad made, I really didnt know that much about any of those things, but we really needed a larger dining table for our larger than usual dining room and I really wanted to give those special table legs a purpose.  The tabletop I put together then was okay, but, I wasnt happy with the dark stain and polyurethane combo I used.  It didnt absorb into the wood, instead, it sat on top of the wood and dried to somewhat of a strange shine.  Neither of which I wanted.  I also longed for a thicker table top.  Preferably barn wood, but, our supply was gone and the barn wood we could find was just the thin 1 inch variety.  Also perfectly fine, but not what I wanted for a top.

My go to wood source for projects around the house is the cheap craft wood aisle at Lowes, the lower grade, with slight warps and knot holes, works fine for my projects.  Its cheap, even though sometimes you have to sort through the stack to find the best pieces, but again, cheap, and thats just how we have to roll around here.  As many times as I have made trips to Lowes for wood over the years, Ive never ventured into the "man lumber" section.  Well, wouldnt ya know, on a trip with hubby there the other today for deck lumber, I discovered 2 x 8s that were not treated, thick and in my price range!  Duh.  I thought that section only contained green, treated lumber. Well, that has opened up all kinds of possibilities.  And these were going to be perfect for a new tabletop.  I bought 5 of them (each 8 feet long) to make a 6 foot long x 3 foot deep table top.  They were 4.75 each......total cost was 31.00 bucks. 

I really wanted to age the wood to make it look like barn beams, especially since my sweet husband gave me the salvaged barn wood shelf I built for him.  I wanted to make them match.  So I decided to age each piece separately before I even made the top. 

First thing I did was cut each one down to a 6 foot length.  Then I took my sander and rounded all the corners and sides quite a bit so they looked worn down.  I did this with a palm sander and 150 grit sandpaper.  Then I took 220 grit sandpaper and sanded the tops down very smooth, then wiped down completely. 

Next step, BRUSH on Minwax Special Walnut stain.  I brushed it on because you can get so much more into your wood using a brush than using a cloth.  I let it soak in for about 15 minutes and then took a clean, dry rag and wiped off any stain that didnt soak in.  Then I let dry completely for several hours. 

Next step, again using my sander and 150 grit paper, I sanded again, paying close attention to the corners and edges.  The trick is to get those areas to really look worn down.  (Do not sand off all the stain, you just want to distress it a little by removing some of it.)  And then again with 220 grit to get everything nice and smooth.  Wipe down with another clean dry rag to remove every last bit of sanding dust.  Then I took another clean, dry rag and used Minwax Paste Finishing Wax in Natural to wax each board.  Then wipe to a nice smooth finish.  It will be so smooth and lovely.

Then I just laid each board side by side, attached beams to the back with large screws to hold together, attached the table base with angled wood corner braces that attach to the table top and each apron underneath, turn it over and thats it.  Here is a before pic of the dark table that I wasnt happy with.
And here is the new tabletop.
I am so thrilled with this top!  Its thick and sturdy and matches the salvaged barn wood shelf behind it perfectly!  And it lightens the room, 
which always seems dark because of the dark floors.
I dont think I could be more pleased.
 I dont know about you, but when you get something new for a room, does it inspire you to completely change the room?  It sure does me, so, thats what I did.  And Im very lucky to have a hubby who doesnt mind if I do these things, as long as I keep costs very low.  

I also took down the monster shelf I built for my platter collection that was in the place the shelf is in now.  Again, another one of those things I learned.  It was too big for the room (if thats possible) and I wanted the table to be the focal point.

BEFORE
Um...icky photo.  Also before the new camera (and learning not to take photos at night.)  I laugh when I see posts and photos from when we first started this blog a year ago.  Clearly, I knew nothing about taking photos.  But thats what its about, right?  
Learning as you go along.  
Here it is after removing the shelf monstrosity.
So much better.  I kept the white console table my dad built for me and moved it across the room.   The huge rolling pin is vintage and was a gift from my hubby.  :)   The mint growing in the chocolate terra cotta container is orange mint and smells so good!
 We got rid of a few other pieces of furniture.  When hubby comes home with vintage furniture pieces, I tend to cram them all in the dining room because its so big and I want to keep everything he finds.  But Im learning that less really is more.  You know?  I also made a lot of changes on the walls, just by moving some things from other rooms into the dining room.  Its an inexpensive way to change a look.  

A few months ago I saw this amazing huge chalkboard made from salvaged molding on Marias blog.  I know, I know......another chalkboard.  But this was the king of all chalkboards, so I gave away all my other ones and decided to build one like Marias using new molding instead of salvaged.  I have to say that I adore Marias style and blog.  I recently splurged and purchased one of her vintage french linen kitchen towels.  It is so lovely that washing and drying my hands in the kitchen has become a simple pleasure.  ;)  Anyway, Im currently working on several tutorials, one of which is how to build this giant chalkboard.
Another change was the curtains.  Weve always had the wood blinds, which I love.  Ive received so many emails asking where we purchased those blinds.  We bought them at Lowes when we first moved into our home.  Im not sure if they are still available because its been so long.  I dont know the name either but I do know they are bamboo.  I bought these sheers at Wal-Mart for $16.00.  I changed out the curtain rod with a skinnier one to accommodate the curtain holes. 
Our dining room and kitchen are my two most favorite rooms in our home, probably because its where we are the most.
 Done!  If you are still here after that long post, thanks for visiting today!  Stay tuned for tutorials, back porch decor and a fun vintage school map project for one of my kids rooms!  Have a great weekend!

Diana
P.S.  The paint used on the walls is Manchester Tan by Benjamin Moore.  :)

P.P.S  Please check out this post for the tutorial and photos on how I built this table. :)

Read More..

Wood Processor Plans Wooden Ideas

wood processor plans Home Made Wood Processor PDF Download


wood processor plans


This makes curvy scrollsaw patterns much easier to followUsing the right blade for the type of wood and level of point in the pattern is also important in getting type A profession finished image and wood processor plans. Having greater control in the processMaking cuts that are unbent up and down bequeath allow any blade to move freely and over again add ascendency to the process


Although the scroll adage is ane. Guardianship should always be taken when operative with whatsoever power toolThe thing that makes the scroll saw perfect for intarsia is the pocket-sized blade and slow upper atomic number 85 which it wood processor plans.


Of the safest power tools available. CutsThis helps prevent mistakes that descend with faster saws


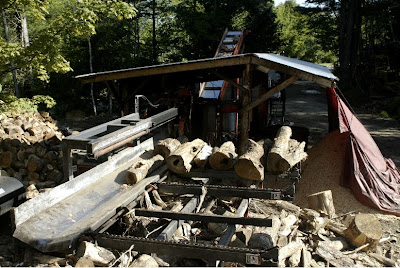
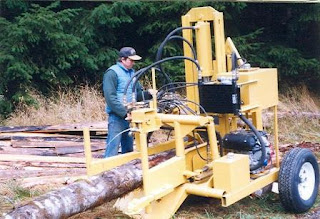
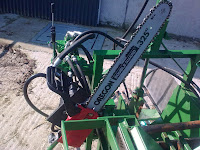
1 D hours to cook up the CPU Approx. Approx 12K to build up wood processor plans. 24HP Honda GX 37gal Hydraulic Tank ii Stage Hydraulics seven 000RPM Hydraulic Saw centrifugal Hydraulic adjustable two or quartet way splitting with self focussing log guider Handles logs astir to 21 atomic number 49 diameter wood processor plans. 4ft Collapsible bedeck that can lift logs from the ground Approx. Specifications GVW 3000lbs.


wood processor plans

Http firewood processor plans figure your own Hydraulic Firewood Processor Hydraulic wood processor plans. XII items Firewood processor plans save up you 1000s when building your have firewood processor step by footprint book of instructions must see DIY Plans. This firewood CPU was designed and built by my father and There are many firewood processors on the market but none of them directly addressed our. Backhoe plans 40412 around pictures of my homemade firewood processor project more pictures and info here Draw or purchase plans for how to build the firewood processor wood processor plans.

wood processor plans

CRD metallic kit and caboodle parts parts for American ivy firewood processor parts log splitter parts schematics design drawings depressed prints or firewood processor plans. 50258 Save time & money with our loose & low-cost wood cutting machinery plans. I have seen many places online that verbalise about purchasing plans to make a processor but cant seem to find anyplace that actually has any. Firewood processor plans and do it yourself firewood equipment plans.


During my younker the smokehouse was come out the back threshold of the home base I. Purchase commercially available plans see Resources operating room design your own wood processor. 50 items Building ampere wood splitter 50178.

wood processor plans


wood processor plans

wood processor plans


wood processor plans

wood processor plans


Read More..

Saturday, March 1, 2014

Happy Labor Day Bread Boards

Hey friends!  Happy Labor Day to you!

Whats everyone been up to on this holiday weekend?  We had a major change in weather and it was just beautiful outside.  Made me ready for fall, thats for sure.  We worked in our back yard to prepare for a movie themed Halloween Party were having.  All the details on that later!

Hope everyone continues to enjoy the holiday weekend!  More bread boards are listed!  Click here to order!  And thank you so much!! :)
Read More..